Clover - Printers
My kitchen printer is not connected!
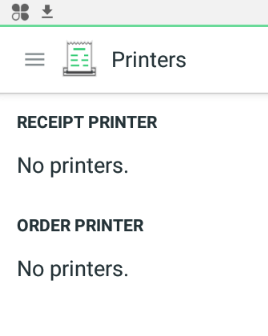
If you are wondering how to connect the printer, or your order printer simply stopped printing orders for your kitchen staff, you will first want to open up your Printer app. This will list your receipt printer, order printer, and/or your label printer. We are looking for your order printer. If you do not see an order printer at all, click the green plus button in the bottom right corner, and attempt to add the printer. If the printer is showing at all, or it’s showing but says “offline” you will want to take a look at the printer itself.
On the front of the printer you should see a little light next to the power button. If the error light is flashing red, it is having some connectivity issues. Either way, you will want to power the device off. Check and make sure the ethernet cable is plugged in tightly to the printer, as well as to your router/modem. Once the device is powered off for about 15 seconds, power it back on. Watch the light on the front of the device again. You should see it flashing red or yellow, and then finally, green once it is online.
From here you will want to go back to the Clover Printer app to see if the printer is showing. If it is still not showing, you will want to check what network your Clover device is connecting to. Remember, the printer and the Clover must be on the same network.
Bring online a connected order printer
Bring connected order printers online to use them in your Clover POS network.
Get ready to bring the printer online:
- If you’re setting up the printer inside your Clover device, make sure your device is plugged in, connected to your network, and activated.
- If you’re setting up a Star Micronics accessory printer, make sure the printer is plugged in and connected to the same network as your Clover system.
1. On the Clover device connected to the printer you want to bring online, tap to open the Printers app.
2. In the lower right corner, select Add.
3. Choose Order Printer. The system shows you order printers connected to your Clover network.
4. From the list of connected printers, select the printer by name. After you select the printer, the system recognizes your printer, brings it online, and adds it to the online printers list.
5. (Optional) Select Add and repeat these steps for each printer you want to add. For example, if you want the system to print orders on your Clover device printer and a Star Micronics order printer, add each printer, one at a time.
You can take a printer offline when you want to temporarily stop printing orders. You'll need to do this on the printer, itself.
Take a printer temporarily offline
1. Go directly to the printer device.
2. On the printer, switch off the power.
You can also disconnect the printer if you're not using it anymore.
Disconnect a printer from your Clover network
1. On your Clover device, open the Printers app.
2. Select the printer.
3. At the top right, choose Delete.
Fire an order to an order printer
When you fire an order to your order printer, a receipt with details about the order is sent to the printer. In addition, every item on the order receipt displays the word Printed on the Clover Dining sidebar.
1. Open Clover Dining.
2. Select a table containing an order.
3. Select Fire.
Automatically send items to order printers
Automatically send items to order printers when you have more than one order printer and you want specific types of items to go to specific printers.
Use a custom printer label
For example, if you have a restaurant and you want all the dessert orders to go to the pastry chef, you can give the chef an order printer. Then you create a custom printer label for the order printer in the chef’s area and assign items to it. This sends all desserts with this custom printer label to the pastry chef.
You can set up a custom printer label by:
- Adding items to your product inventory that you want to send to a specific order printer.
- Creating a custom printer label.
- Assigning the custom printer label to the items you added.
- Assigning the custom printer label to the order printer.
Start by thinking about which items you might want to send to an order printer. Then add these items so they’ll be ready for the custom printer label.
Add items for a custom printer label
1. On your Clover device, tap to open the Inventory app.
2. Select Add New Item.
3. Enter the item name. The name is required. That’s all you need right now.
4. (Optional) Add more details to describe the item, such as price and cost.
5. When you are done adding this item, tap Save.
After you add items, create the custom printer label.
Create the custom printer label
1. On your Clover device, tap to open the Inventory app. If you just added items, you’re already here.
2. Tap Labels.
3. Tap Add.
4. Enter a name for this label. You might want to use the printer name, such as Star Printer, or a location name, such as Kitchen, Bar, or Pastry Chef for all those dessert orders. This way you and your staff quickly understand where they’re sending the order.
5. Tap Done.
After you create the label, assign the label to items.
Assign the custom printer label to items
1. On your Clover device, in the Inventory app, go to the page with your new label.
- If you just created the label, the page is open now. You can see the name of your new label, for example, Kitchen, at the top.
- To use an existing label instead, in the Inventory app, tap Labels and search for, select, and open the page for the label you want to use.
2. On the label page, choose Edit at the top right.
3. On the Edit Label page, select your items:
- To send all items to this order printer, check the box at the top of the Name column. When you add more items to your inventory, come back here to select them specifically, as described directly below.
- To send only specific items to the order printer, either scan, search, or scroll, and then select them one by one.
4. When you are done adding items, tap Save. (You don’t need to check the box for using the label as a revenue class.)
After you assign a custom printer label to items, assign the label to the order printer.
Assign the custom printer label to an order printer
1. On your Clover device connected to the order printer, tap to open the Printers app.
2. In the Printers app, tap the order printer name. The system shows the printer and, at the bottom, your inventory item labels.
3. Find and select the custom printer label you created for sending items to this order printer. (You can optionally select any label. The system will send all items with that label to this order printer.)
4. Tap Save.
All items with the label you selected will go to this order printer.
If you want to stop automatically sending items to an order printer, you can disconnect the label.
Disconnect a custom printer label from an order printer
1. On your Clover device, tap to open the Printers app.
2. In the Printers app, tap the order printer name.
3. Find and deselect the label you created to use for sending items to this order printer.